Showing posts with label gardening. Show all posts

Tuesday, March 11, 2014

Winter Sowing 2014


I do believe this will be my 11th year winter sowing! I can't believe I have been doing this for so long, but I guess time goes by quickly.
I started winter sowing my seeds in February. We had a few days in the 60's, so I took advantage of the "spring" air.
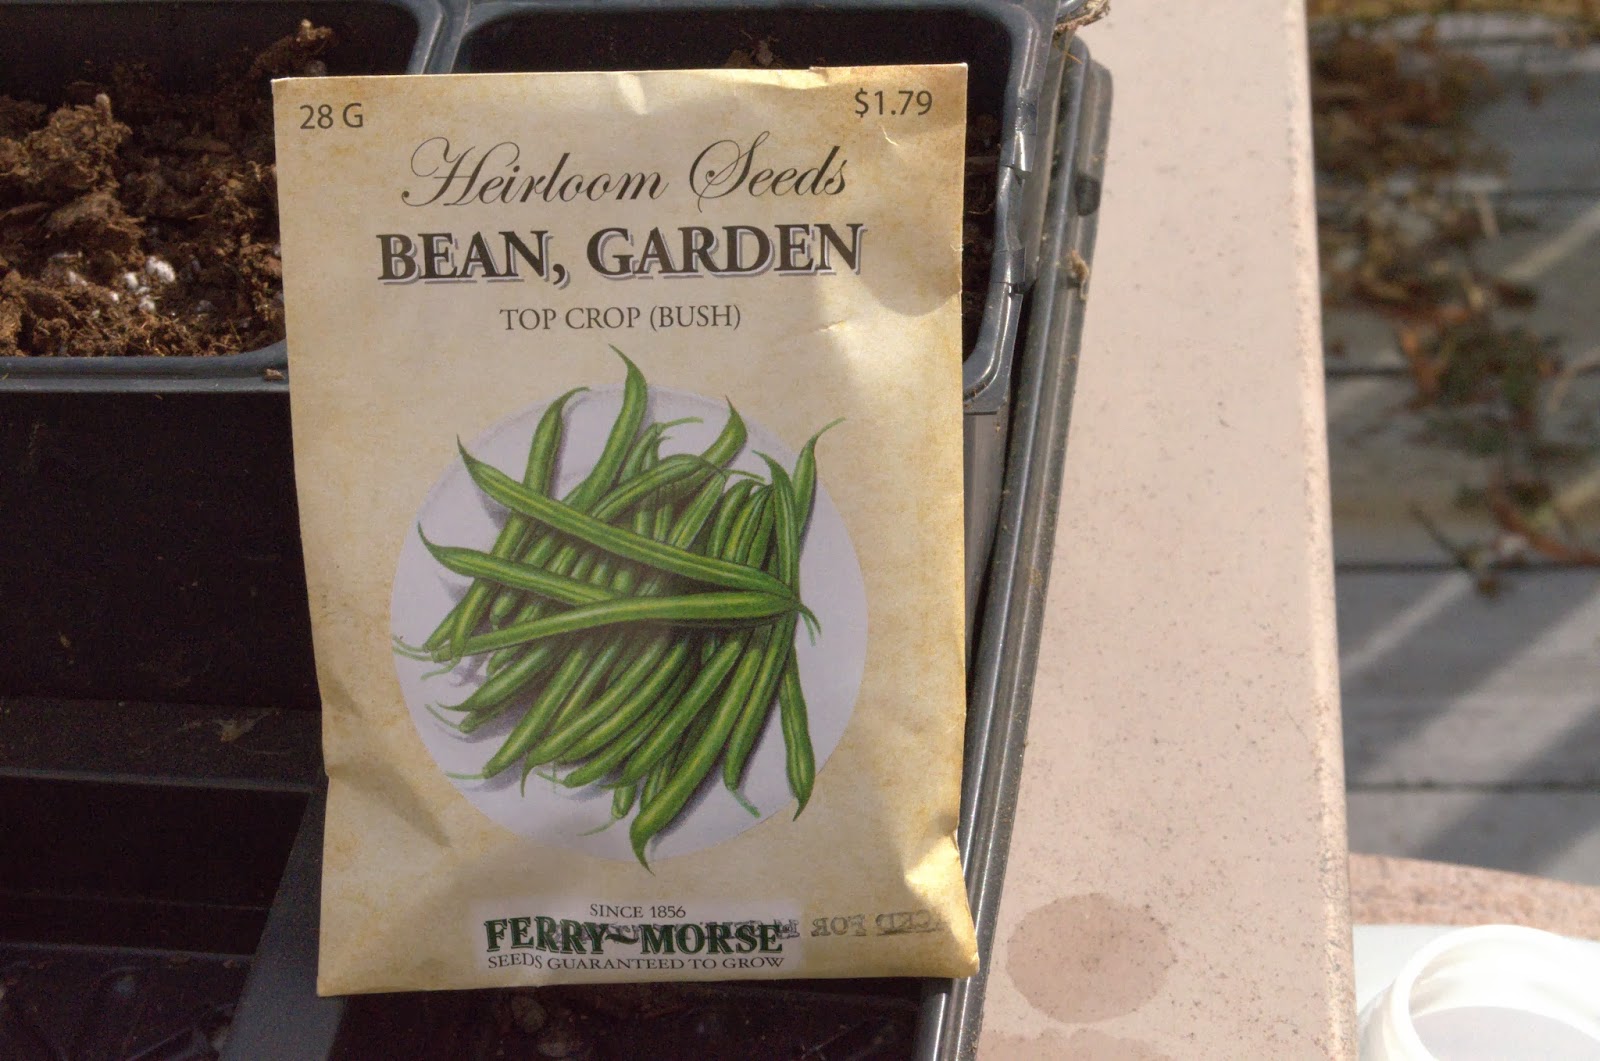
I use both empty milk jugs and plastic pots for my seeds, but I will just show my milk jugs today.
First, I gathered all my seeds. Last year I mixed my seeds up, so this year I am being overly cautious by sowing one type of seed at a time. I planted a variety of veggies (cucumber, tomatoes, green beans, peas) and some annuals and perennials.
For milk jugs, you need the transparent jugs. They are semi transparent and if you hold a finger to the side, you should be able to see your finger. You want to let in light, so stay away from the solid white jugs.
I bought my soldering gun from Big Lots years ago for just a dollar or so. You can find them in most hardware stores. You can tell  by my picture that they take a beating.
I use my soldering gun outdoors because of the fumes the plastic emits. It really stinks, which is another reason I waited until a semi warm day to do this.
You don't have to use a soldering gun to make the holes, but it makes the job much easier.

 I put several holes on the bottom and a few on the side. Make sure you make a hole next to the handle. This is where you are going to place your scissors to cut the milk jug in half.
After cutting the holes, use duct tape to mark your jug with your type of seeds. Duct tape will not come off when wet. I use perm marker to write so the ink doesn't wash off. The reason why you mark the bottom of the jug is because the pots will sit outside for several months and in a short time span, the sun will fade the marker and you will be left with mystery seeds!

Using the hole by the handle, cut the milk jug in half, leaving the handle still attached. The handle acts as a hinge for the jug.
Fill the jug with potting soil and wet the jug until the soil is heavily saturated and water is streaming out the bottom.
Sprinkle your seeds on top. You can add a little dirt on top on the seeds if you wish. I found either way works.

Using a VERY long piece of duct tape, tape the jug closed. I use several pieces of tape for this.
LEAVE the cap off. You will not need the milk jug lid, so you can throw this away. Place your milk just in a sunny spot on your patio or deck. Do NOT place on a table, as wind will blow your jug down.

That's it! You are finished!

Now, you wait until warm weather visits your area! When it gets a little warm outside, check your jugs for moisture. You don't want your seeds to dry out. When the jug becomes lightweight,  use a watering jug to gently spray the soil with water.

Below are some pictures using 4 inch pots. I use "under the bed" sweater bags to hold the pots. You can buy these at the dollar store. Cut holes in the top, and bottom, for drainage.

I use tape on the bottom of each pot too. The spoon are used to keep the plastic off the surface of the dirt. You can also use straws, or sticks. I use the spoons as plant markers when planting the plants. I write the name of the plant on the spoon part and bury into the ground. This keeps the ink from fading.

Here is a lettuce container I used for seeds. The condensation on the top is what you want to see. You will see condensation on your milk jugs too.


Some Black Eyed Susan from last year.

Let me know if you have any questions!

Columbine that too 3 years to bloom!


Thursday, August 23, 2012

In Spite Of The Drought

In spite of the drought we have had in St. Louis this year, I was able to produce tons and tons of cherry tomatoes! The large tomatoes were few and far between, but I was able to pick some, and they are still producing.
I don't usually cook with the tomatoes, as we usually just add them to salads and pawn the rest off to friends and family.

This year I decided to do something with the large basket of tomatoes and peppers sitting on my counter getting ready to rot.

The first thing I made was roasted tomato and red pepper soup. It was really really good, and it increased my interest to find other ways to use up this crop (we have tons and tons of tomatoes!).

So, the other day I decided to make my own spaghetti sauce. Now, this may seem boring for most, but my idea of tomato sauce is reaching into the pantry and taking out a jar of red stuff.

First I grabbed a large roasting pot and stuffed tomatoes, onions, peppers, and a few mildly hot peppers. I sprinkled the veggies with rosemary olive oil and basil.
This is after a half hour. I stirred and plopped them back into the oven. I did this 3 times, for a total of 1.5 hours at 450 degrees.


I forgot to take a picture of what I did next, but just close your eyes and try to imagine! I took half the veggies out and froze them for a later recipe. I put the rest in a smaller pot. The reason why I did this is because I used an immersion blender to blend the roasted veggies. If the pot is not deep enough, sauce splatters everywhere. i highly recommend an immersion blender as you can see by the pic, the veggies are now a nice thick sauce without any chunks.

The tomatoes I used were sweet cherry tomatoes, and the sauce came out very sweet tasting. To calm down the sweetness, I added a little cream (who doesn't like cream?) and that did the trick.
 Boiling the noodles. I used a small pot since there are only the two of us. :)
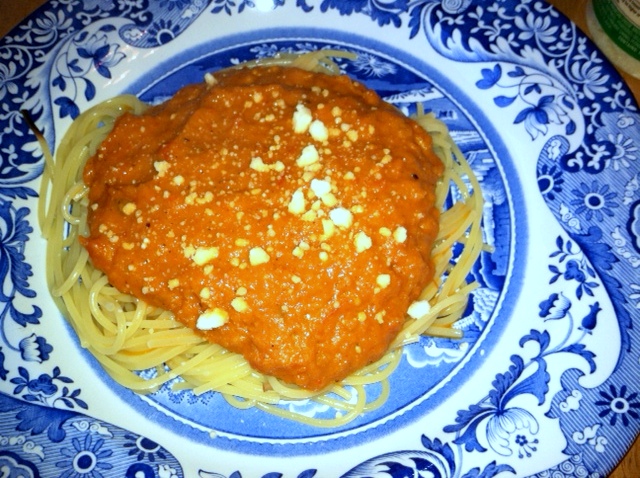
Here is the sauce with some parmesan cheese on top. I know it's a lousy picture, but by the time we sat down to eat, it was dark outside....and I wasn't about to take my plate down to the light box for a photo shoot!

So, there you go.....roasted tomato pepper spaghetti sauce! We had garlic bread and a salad, which made a tasty dinner!


Wednesday, April 20, 2011

It's Spring time in St. Louis

 My Zinnia's have come up and they look strong and sturdy...whew! I planted mostly red one, which I am going to use for cutting flowers. These were Winter Sowed, of course! They were the first to sprout out of all my seeds.
Last year I planted lots of Zinnia seeds in my veggie bed. They turned out to be dwarf Zinnia's so I had a very pretty veggie garden, but no cutting flowers (the stems were too short).
 Here are my gardening buddies. Scout and Finch were next to the house. I think they were tired of planting. They like to eat my veggies, but are not too interested in the planting process.
One of my favorite plants, Forget Me Nots. They have the prettiest blue which I can't seem to capture in my camera.

Wednesday, July 7, 2010

Fresh Blackberry Pie

Our Blackberry bushes went crazy this year and produced lots and lots of berries! We have had blackberries before, but just enough to pick and snack on. I measured the berries I picked yesterday and today, and I had just enough to make a pie. Hubby is home with a shattered toe, so I thought a homemade pie would cheer him up. The above picture was taken before the berries ripened. They are now black and some were dripping juice!
I can't even remember the last time I made a pie, so I used a deep pie dish, although I didn't need one. Doesn't it look yummy??

Monday, June 21, 2010

It's Summer in St. Louis - HOT!

I took a stroll through the yard the other day. Every day I take my two puppies, Scout and Finch, for a walk around the yard. They are only interested in finding worms to eat and catching squirrels, but I don't mind as long as they stroll with me.
I didn't winter sow as many plants this year, but I had plenty. One of my favorites are the Sunflowers! These were planted along side the house and I had to crop the picture in order to screen out the garden hose and the meter reader....lol!
I start most of my plants by seed. These were planted a few years ago and I divided the plant and transplanted them into some beds we started in our front yard.
This beautiful flower is called a Brown Nose Rudebekia (I'm pretty sure..). They reseed everywhere, but I planted this bunch under our Black Oak tree. They hide the Iris that have already bloomed.
Last, but not least, is my Blanket Flower. I started this flower about 5 years ago and it has happily reseeded all over the yard. They bloom all summer!

Wednesday, March 24, 2010

Winter Sowing Seeds Are Up!


Spring has sprung and I'm getting all kinds of sprouts! This pictures is of my Bachelor Buttons. I planted:
Tomatoes (2 kinds)
Green Beans
Cucumbers
Zinnia's
Poppies
Blue Flax
Bachelor Buttons
Sunflowers
Alyssum

My sunflowers are about 3 inches tall already! I worked in the garden today trying to get the beds ready for the new plants. My veggie garden is all ready, but the older beds need lots of weed pulling.
Today I worked on digging a small trench to line my beds with. It's not the perfect solution, but it does help keep the grass out of the beds.

Thursday, May 21, 2009

Fun With Flowers In St. Louis

One of my favorite things to do is walk around my garden and capture the beauty of my flowers! The above picture is one of my dwarf Iris's. I planted the bulbs 2 years ago and this is their first time blooming. I'm in love with blue flowers these have become my all time favorite!
I tucked this Hosta in my back bed 2 years ago. I had no idea is was going to get this big! I take pictures of my clogs next to the plant for comparison. It will be split this fall!
I plant most of my plants by seed and this Columbine too 3 years to bloom, but it was so worth the wait! The details are just amazing. I planted these as "extra's" since I had so many plants come up, and these are planted under my window boxes in the front of the house.
Another true blue Clematis! This one trails on our white banister in the back yard and blooms for a very long time!

Monday, May 4, 2009

Monday Finds!

Monday finds! Monday's are not the most favorite day of the week....at least not for me. I've decided to turn a dreaded day into a shopping day! Every Monday I will share some of my Virtual Shopping, which I'm going to call Monday Finds.
I love finding art in inconspicuous places. I have always admired vinyl art and these really caught my eye. To see where to purchase, just click on the picture.
This adorable art is from vinylwalldesign. I think these would look great in a kids bedroom, bathroom...or in the hallway.
I just love this! ChuckEBrydWallArt made this subtle artwork. This would look great in my half bath!
Elephannie made this little chickie. I think I would buy more than one!

Thursday, March 26, 2009

Spring Has Sprung!

Spring has sprung! I've been working on the beds for the past few days. Most of them have been neglected due to my ankle surgery last Spring. My favorite flower , or at least the one I love looking at the most, are the Red Hot Pokers (pictured above). I cleaned out the dead leaves and I can see lots of new growth at the base. I started these by seed, and have divided the plants several time. The stems can be 3 to4 feet tall and the bloom is about 5 inches tall. A very stunning plant!
Peeking out are my Sweet William. Not many came back last year, so I will have to sow more for the upcoming year. They are in the very back of the yard, so I can't see them unless I am in the backyard with the dogs. I need to move them closer to the house.
Cleaning out all the grass, I noticed lots of baby Gallardia's. They bloom all summer long and will grow just about anywhere...we have a few growing in our grass last year!
It was fun getting my hands in the dirt. Nothing replenishes the soul as peering at a worm at eye level!

Monday, November 3, 2008

Fall Colors In St. Louis

Ah, Fall in St. Louis! It's a beautiful, warm day and the sun is out in full force. I snapped a few pictures around the yard. Above are my two sweeties, Scout and Finch.
A Burning Bush in the very back of the yard. I love how the sun has "touched" just one part of the bush.
This is a tree between my neighbors house. This is what I see when I look outside my back window.
Lastly, this is a Rose that has survived several frosts already! The Rose Bush is full of blooms!

Tuesday, October 28, 2008

POLL: Name This Soap


I'm having a hard time with the name of this soap. Will you please help me out? I have some choices above, but if you have another name in mind, post it here!

Here's the description I have for it:

Tomato Leaf Herbal Handmade Soap is a light, fresh, airy and herb-y scent. It is a blend of all kinds of melons and tomatoes with lemon-lime top notes, fresh leafy herbaceous middle notes and a wonderfully rich and earthy base. My Tomato Leaf Handmade Soap is made using the freshest ingredients, including Tomato Paste!

Tomatoes are a wonderful source of carotenoids like lycopene, beta-carotene, and vitamin E, which have been know to be effective antioxidants.

Wednesday, October 15, 2008

I'm going to miss Summer!

I love Fall. In fact, it's my favorite season....but I'm going to miss Summer!


Tuesday, September 2, 2008

Let me tell you about my dog, Finch! Finch is a Cairn Terrier. Many people don't know about this breed, but when I mention that "Toto" On the Wizard Of Oz movie, was a Cairn Terrier...they nod their head "ahhhh, yes! Finch is 4 years old but someone forgot to tell her! She acts like she is still a puppy. See the blur of her tail? EVERY TIME you look at Finch, her tail starts wagging. She is happy all the time....I wish I could bottle her energy and happiness....I'd be rich!!
Finch lives and breathes to play. Her favorite is her frisbee. The one pictured here is how the frisbee starts out. It's a little dirty, but it's intact. Finch loves to grab the middle of the frisbee and shake it. Eventually the fabric gives away and just the rim is left. Finch doesn't care....she just shakes that rim!

In this movie you can see what happens, over time, to her frisbee. It's also interesting to see how she carefully carries her frisbee. This video was taken last winter, after a big snow.